In this blog post I’ll explain how to use git-flow in order to make your collaborative coding more effective and less stressful.
You can follow through this tutorial if you have the basic understanding of GIT and you use it in your coding projects. You should also be familiar with SourceTree as a GIT GUI tool.
GIT branches
One of the most common problems when using GIT in a team are merging issues. Usually you solve this problem using branches and pull requests. But things can get messy pretty fast if you don’t have a system or a common working protocol.
Also sometimes you’d like to just try out some feature without being already sure if you’d want to keep it or not. If it turns out ok, you’d keep it. If not, you’d like to throw that piece of code away as cleanly as you can. In this case branches are again a good solution.
Install git-flow
Git-flow is a GIT extension that helps you effectively manage branching in GIT. It follows a branching model (or protocol) set up by Vincent Driessen.
First you’ll need to install this extension. Go to this website and follow the instructions under Setup: http://danielkummer.github.io/git-flow-cheatsheet/.
Now let’s see how it works.
SourceTree shortcut
We will use git-flow within SourceTree. First let’s add a git-flow shortcut/button to the toolbar so it’s easier and faster to use it.
- Open SourceTree and then open one of the projects you have there.
- Right-click somewhere in the toolbar and select Customize toolbar.
- Find Git Flow icon and drag-and-drop it somewhere in the toolbar.
![]()
Okay, git-flow shortcut is set up. Let’s see how we use git-flow.
Initialize git-flow
You’re already familiar with the git init command. It initializes an empty GIT repository. Git-flow also has to be initialized. This is done via this Terminal command:
git flow init
Or by just clicking on the Git Flow button in the SourceTree toolbar.
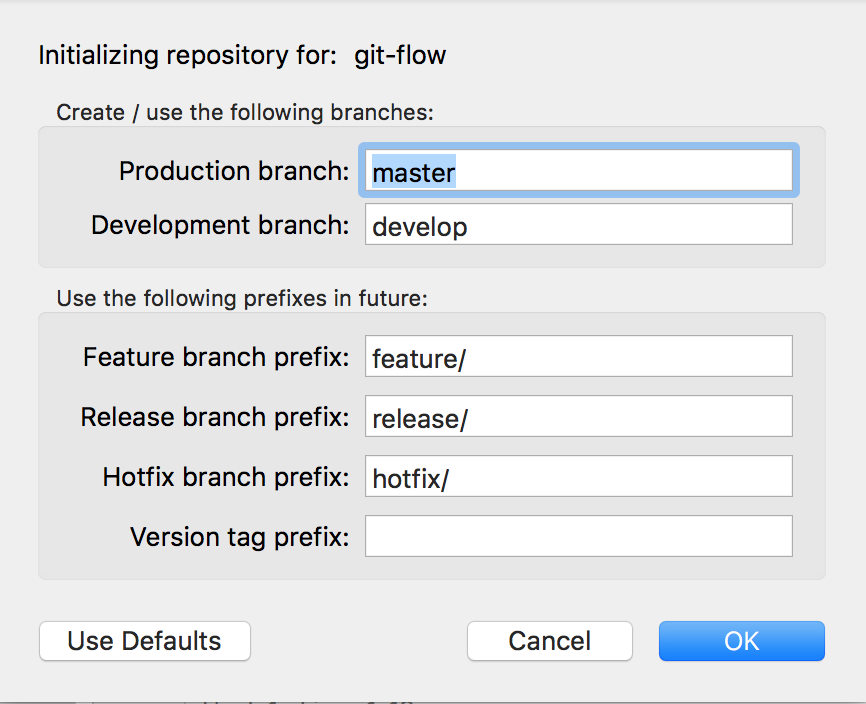
In any case you’ll be then presented with some options (branch names, prefixes) where you just leave default values for each of them.

Important: Before you can execute
git flow initcommand, you have to have a GIT repository initialized.
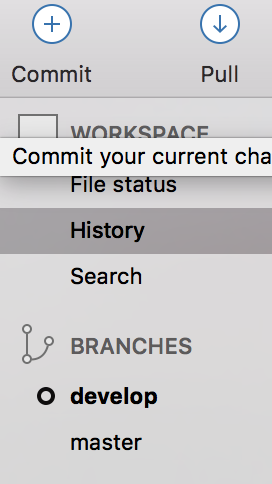
As you can see, you now have two branches in your project: master and develop.

master vs develop
The basic understanding of a difference between the master and the develop branch is that you should always do all the software development on the develop branch. You should never commit anything directly to the master branch.
When you will be ready to push your changes into production (for example deploy your website to the server), you will create a “release” using git-flow, which will merge all the changes in the develop branch to the master branch (we’ll try this out later in the tutorial).
Let’s see how this works in practice.
Feature
Before you start writing some new code for your software project, create a new feature branch via git-flow. Let’s say we have a website and we’d like to add a contact form to it:
- Click on the Git Flow button in the SourceTree toolbar.
- Select Start a New Feature.
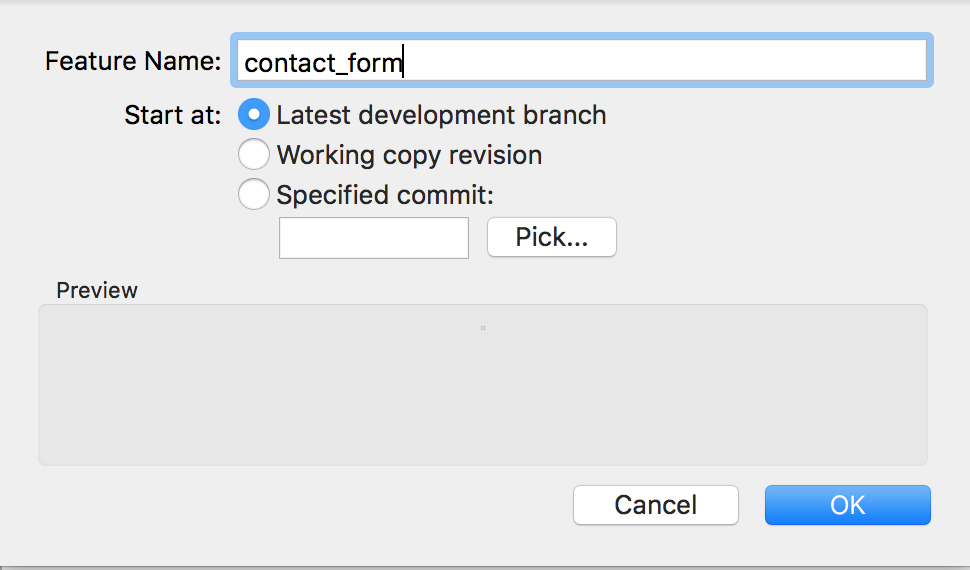
- Write in something like
contact_form(it should be descriptive). Click OK.

As you can see, a new feature/contact_form branch has been created. All the commits you will make will be stored within this branch.
If you for some reason decide to abandon this feature (let’s say you change your mind about having a contact form), you can simply switch back to the develop branch (just double-click on it) and then right-click on the feature branch and delete it.
But more often you would want to keep the feature. When you write all the code for the feature you would want to show it to your teammates in order to be approved. Usually at least one other team member has to approve the feature before it can be merged into the develop branch.
Make some changes in your project and commit them.
In order to show your feature to others, you have to create a so called pull request.
Pull request
The easiest way to create a pull request would be going to GitHub (or any other GIT cloud provider where you push your code to) and create it there. Usually they automatically offer you to create a pull request, when you push something on the feature branch:

Just click on the Compare & pull request button and you will see the form to submit a pull request.
Make sure that you select develop branch for a base. And you can also add some team member as an assignee (to check and approve your pull request).

When your code is approved, you can merge the pull request (you’ll see a button in the pull request on GitHub). Or your coworker can do this.
Alternative way to create a pull request is via SourceTree:
- Click on Repository in the menu bar.
- Select Create a pull request
Pull the changes
You merged your pull request to the develop branch on GitHub. Now you have to sync these changes on your computer too. Go back to SourceTree and double-click on the develop branch. In the toolbar click on Pull so you download the new version of develop branch.
If you click on History tab, you’ll see how a line that represents the feature branch merged into the develop branch.
Finish the feature
Now is the time to finish the feature branch:
- Double-click on the
featurebranch again. - Click on the Git Flow button in the toolbar.
- Click on Finish current.
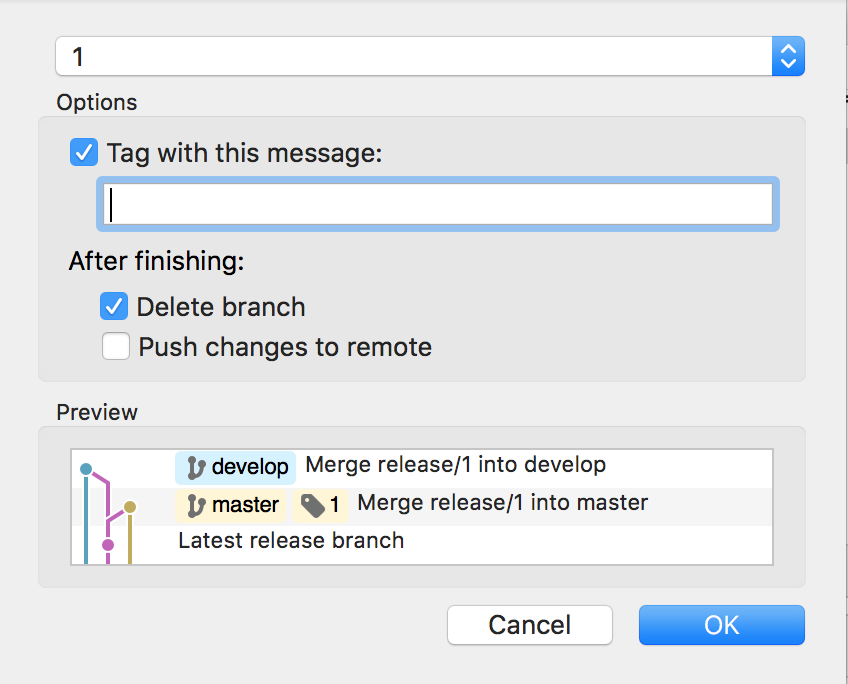
- Make sure that Delete branch in the After finishing section is selected. Click OK.
Voila! You successfully finished the feature you created.
Release
Let’s say you added some more features to your project and you’re now comfortable with it being pushed into production.
Production means pushing website to your main server. Or publishing your mobile app on Play Store/Appstore. Or anything else where you make your project available to the users.
As we said, only code that’s on the master branch goes into production. All the development happens on the develop branch. So when you’re satisfied with the development done so far, you’ll merge the develop branch into the master.
You could do this with the core GIT command called merge. But we’ll rather use git-flow’s release command that gives you some more options (like automatic tags).
- Click on the Git Flow button in the toolbar.
- Click on Start a new release.
- Type in a release version. My advice is always use numbers here. Start with number 1. Click OK.
As you can see, a new branch (release) was created. You can add some “last minute” commits here. Then click on Git Flow button again and finish the release. This will merge all the development commits to the master branch. And if you made some new commits within the release branch they will be merged to the develop branch too.

Push the changes
The final step would be to push the changes made on the master (and possibly also develop) branch to GitHub. Click on the Push button in the toolbar.
Hotfixes
Besides Features and Releases, you can also create Hotfixes via git-flow. This will make another branch that takes the base code from the master branch and at the finish merges with both master and develop branches.
Why is this important? If you see that you made some serious mistake in the production code, you can quickly fix it using hotfixes. But to be honest, this option is rarely used and you should avoid it unless really necessary.
Conclusion
Now that you’ve learned how to use git-flow, try to implement and use it with every project.
If you need a cheat sheet for it, take a look at this: http://danielkummer.github.io/git-flow-cheatsheet/.


